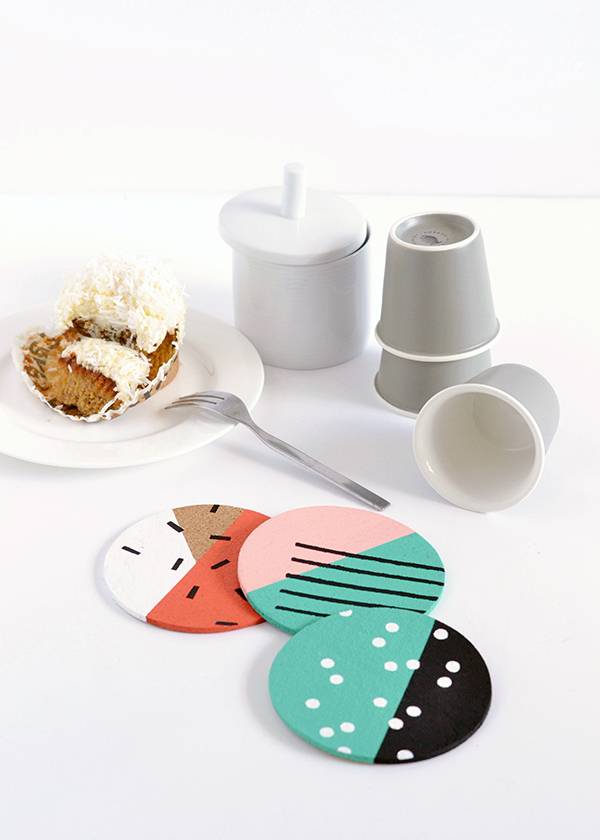
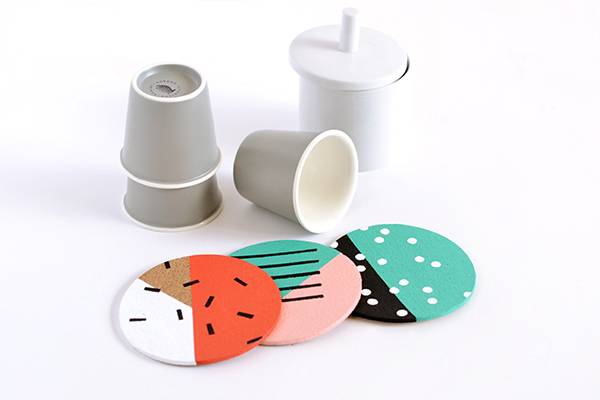
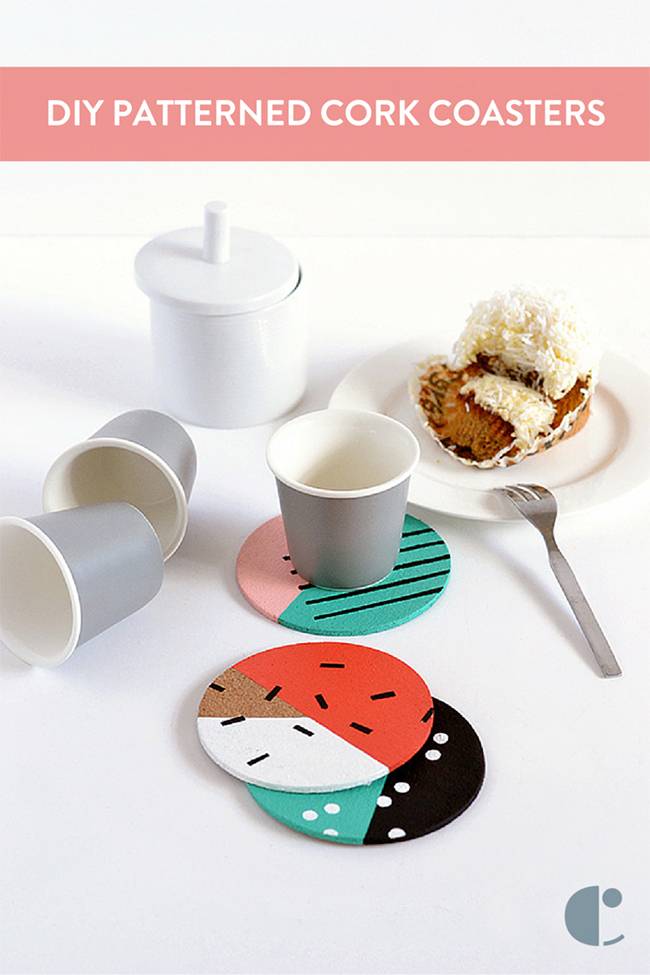
When I shared my favourite designers with you the other day, I wasn’t kidding when I said they’re a big influence on the way I decorate my home. In fact, today’s DIY is a direct result of their colourful, geometric loving ways – after browsing through their works as I wrote my last post, I felt like I just had to add some bold shades and patterns to my next DIY. And here we are!
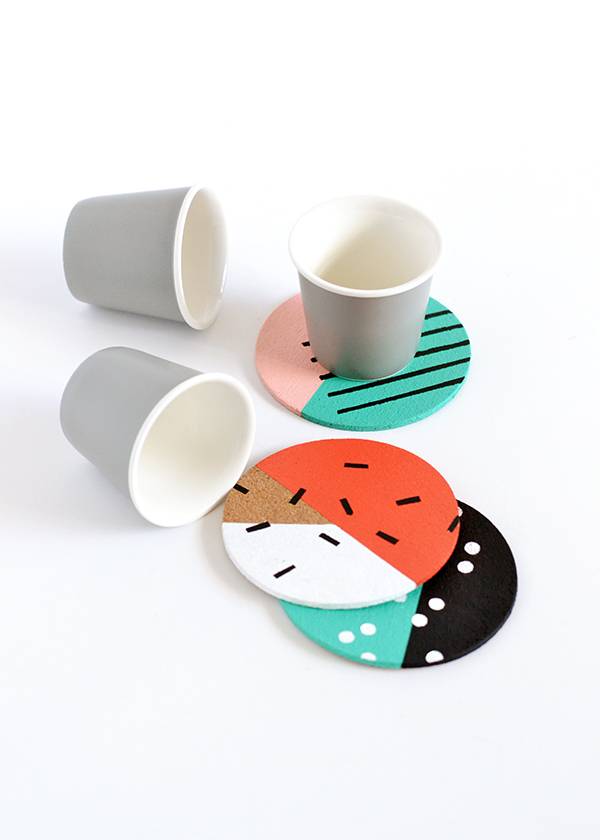
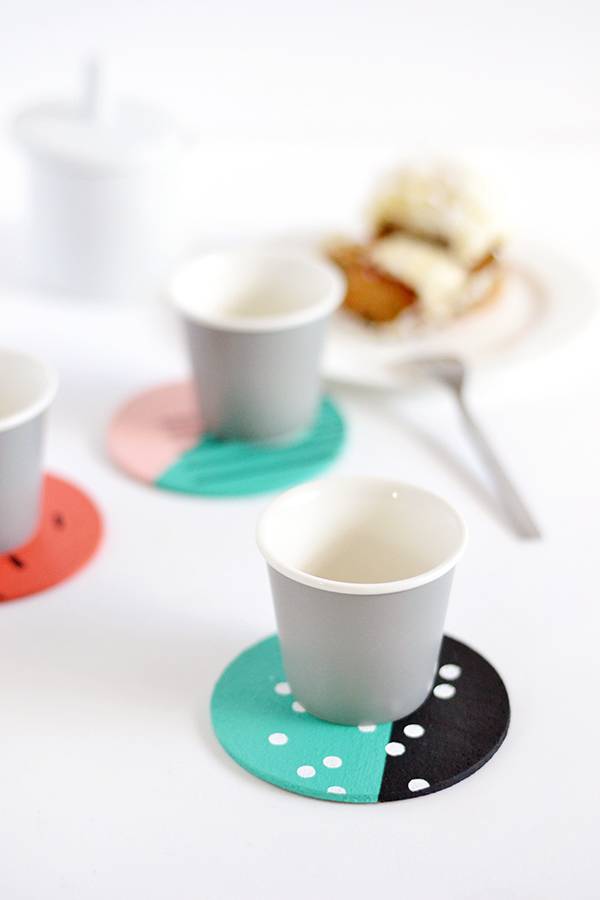
These coasters aren’t just good for adding a burst of colour to your table top, they’d also make great handmade gifts for birthdays, house warmings or Mother’s Day (it’s coming fast, don’t say I didn’t warn you!). You can easily customise the look of each one to suit the personality of the loved one you’re making them for – just use their favourite colours and patterns and you’re onto a winner!
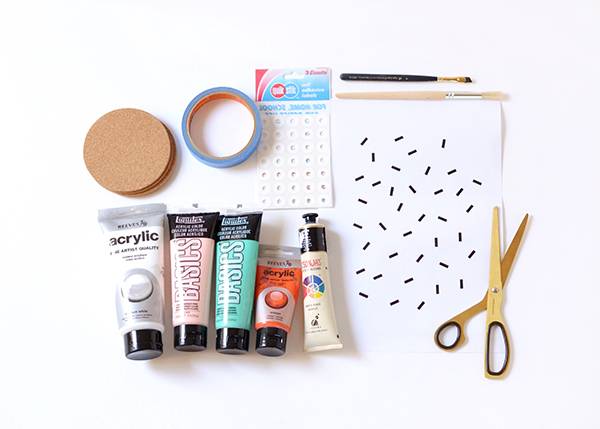
Materials
- Cork coasters (I got mine at Ikea)
- Acrylic paint
- Painter’s tape
- Paint brush
- Stickers (hole reinforcement stickers and letter-sized label paper)
- Sprinkle template
- Acrylic varnish
Step
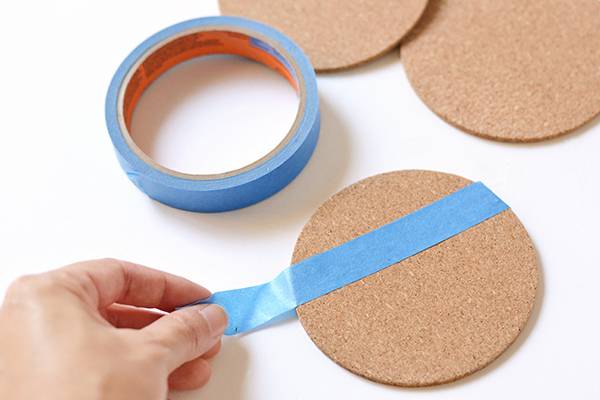
To make the striped coaster: Mark off an area of your coaster using painter’s tape and fill in that section with paint.
Wait for the paint to dry before removing the tape.

Step
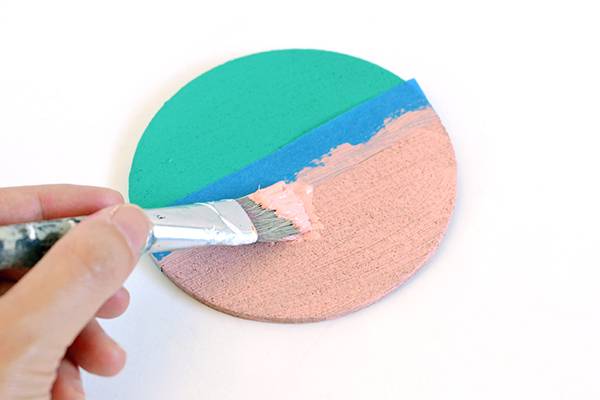
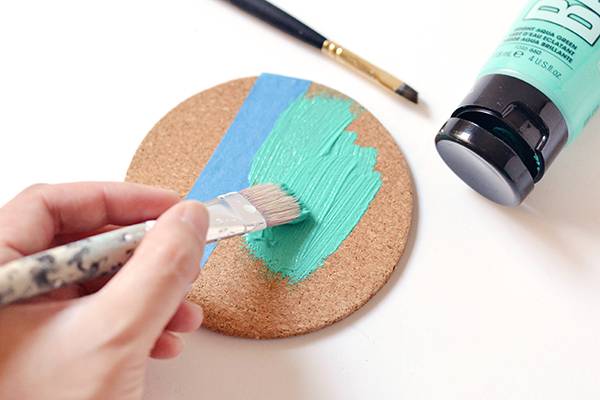
Use painter’s tape to mark off the opposite (unpainted) side and fill in that section with a different coloured paint.
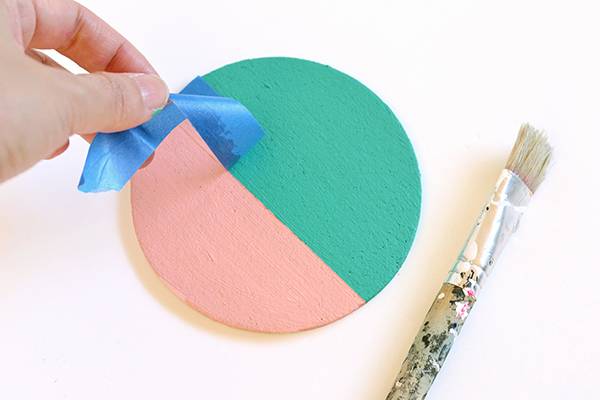
Wait for the paint to dry, then remove the tape.
Step
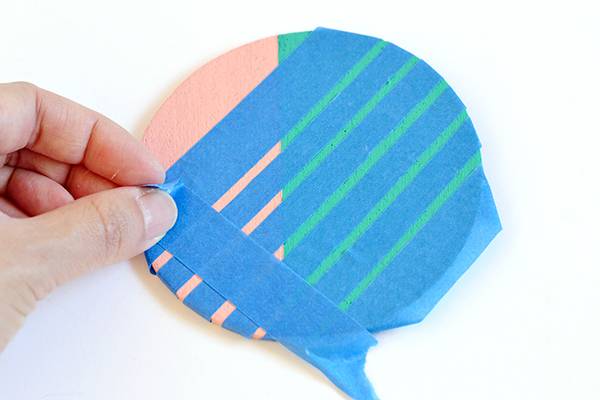
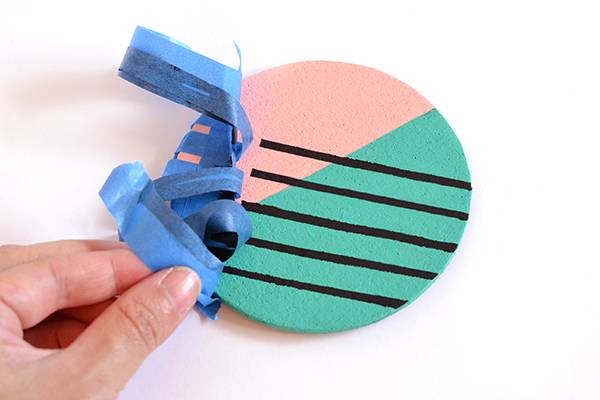
Cut strips of painter’s tape and mark off stripes that cut across both coloured areas on your coaster. Finish off your stripes by placing a strip of painter’s tape at the bottom so they have an even edge.
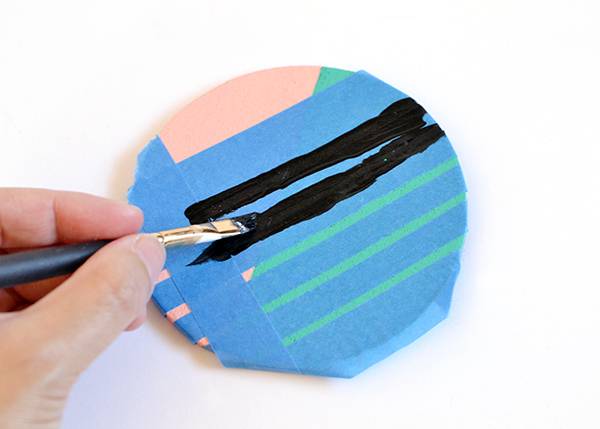
Paint your stripes with a colour you haven’t yet used on your coaster (I chose black). Once the paint has dried, remove the tape.
Step
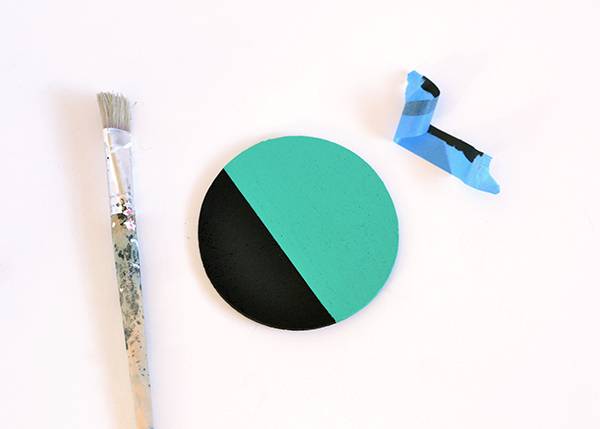
To make spotted coaster: Start by repeating Steps 1 and 2 with a new coaster so the cork is painted in two different colours.
Step

Once the paint is dry, stick hole reinforcement stickers (the kind you use to strengthen punched holes in binder paper) all over the coaster.
Step
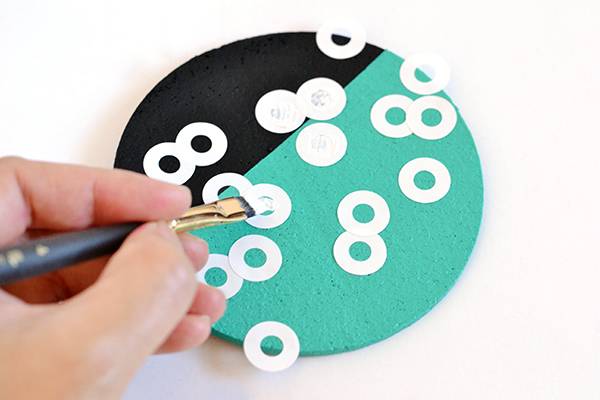
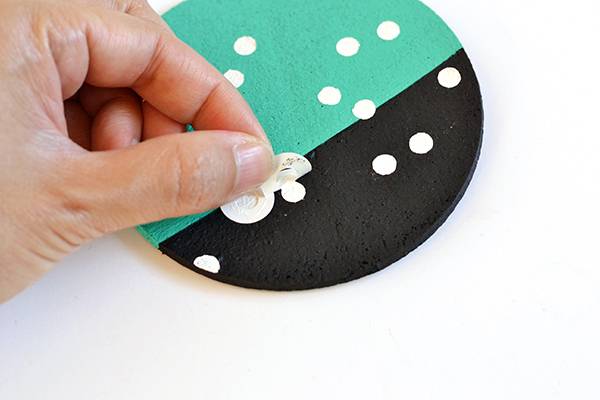
Paint the middle of each hole reinforcement sticker with white paint. When the paint has dried, remove the stickers.
Step
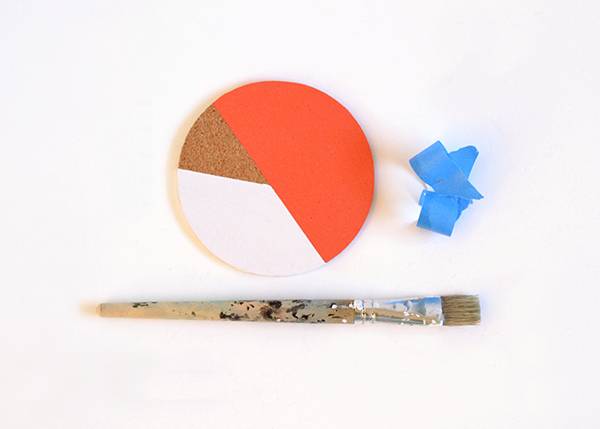
To make the sprinkle coaster: Like with the other coasters, repeat Steps 1 and 2 to paint your coaster two different colours. This time, leave a section unpainted so the cork shows through.
Step
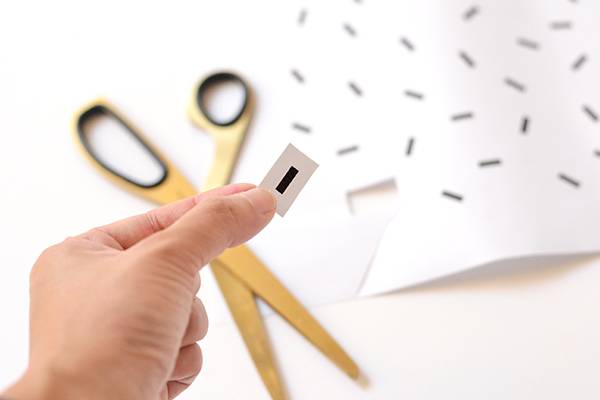
Print the sprinkle template onto letter-sized label paper and cut out the sprinkles, leaving an area of half a centimetre around each one.
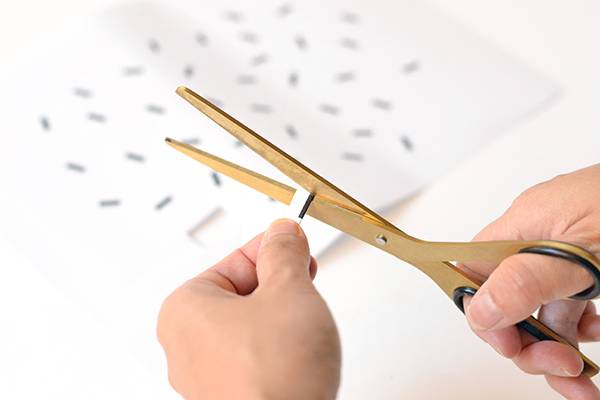
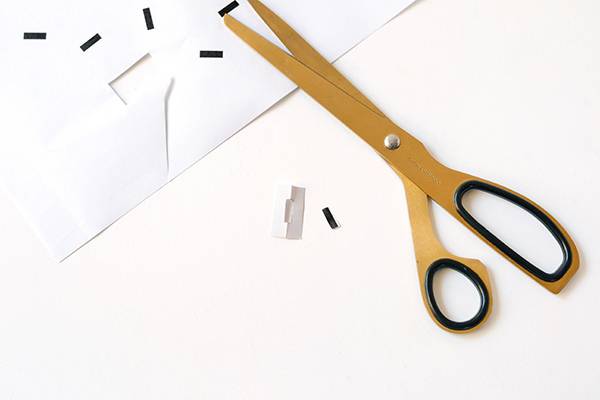
With the backing still on, fold the sprinkles in half and cut out the black areas.
Step
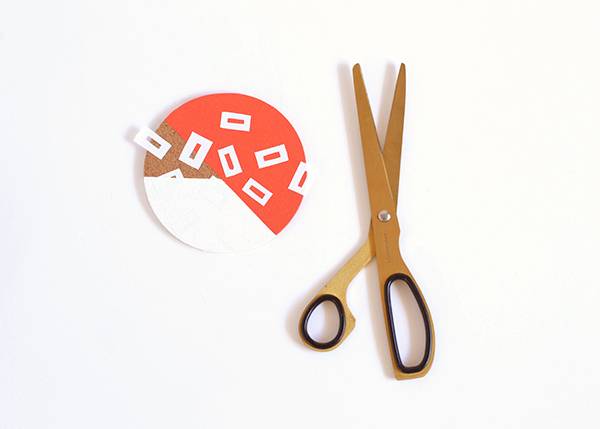
Unfold the sprinkles you just cut, remove the backing and stick them to the painted coaster.
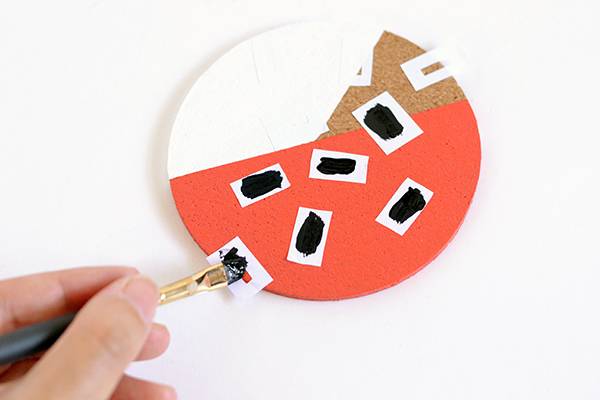
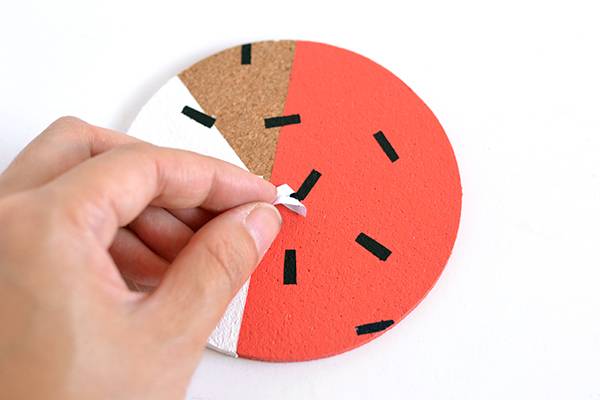
Use the stickers as a stencil to paint in black rectangular sprinkles. Once the paint has dried, remove the stickers.
Step
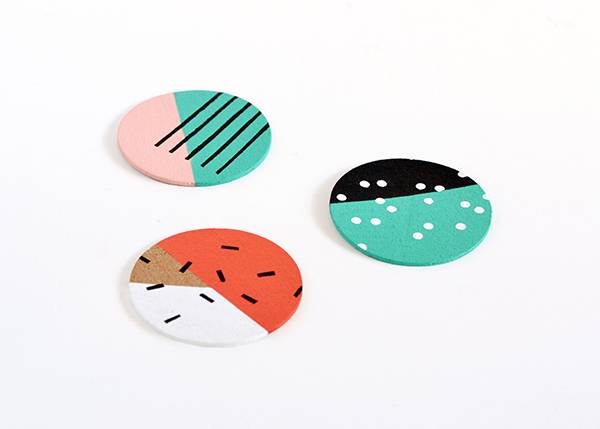
Give your coasters a coat of varnish to protect the paintwork. Once the varnish has dried, they’ll be ready to use (or to give away as a gift!).