
Ever since we moved into our new home, I’ve been itching to find another great coffee table for our living room. I absolutely love our reclaimed wood coffee table that we currently have, but I wanted to switch things up a bit and try something new. After doing a lot of online shopping I found that everything was either a bit more than I was willing to spend or not quite the right shape or size for our space. So, we came up with our very own design, a mid-century modern-inspired boomerang table!
Materials
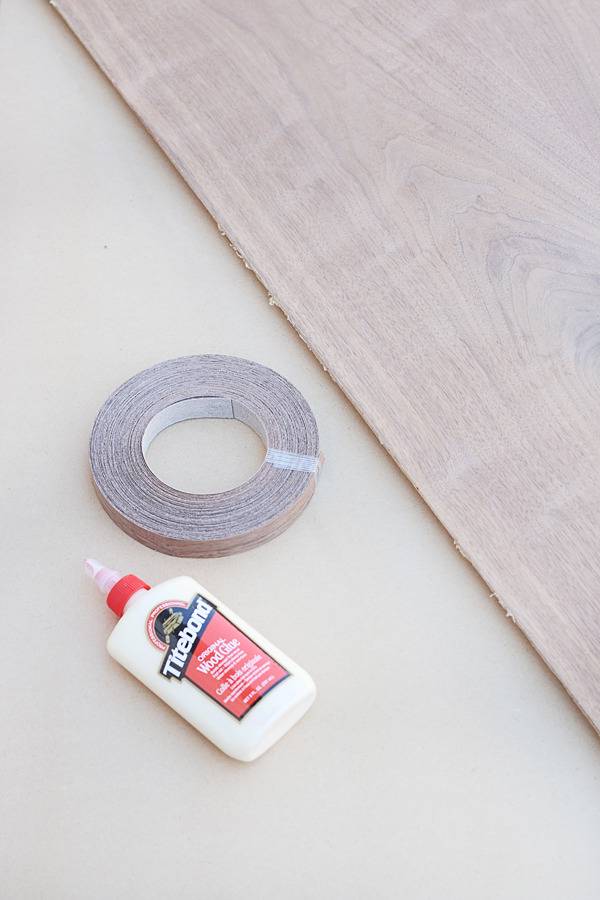
- 1/2” mdf
- 1/8” walnut plywood
- Walnut edge banding
- Wood glue
- Spray lacquer
- Circular saw
- Jig saw
- Medium and fine sandpaper
- Router with flush-trim bit
- Hand plane
- Screwdriver
- Pocket-hole jig
- Drill (optional)
- Tapered legs
- Spray paint
- Masking tape
Instructions
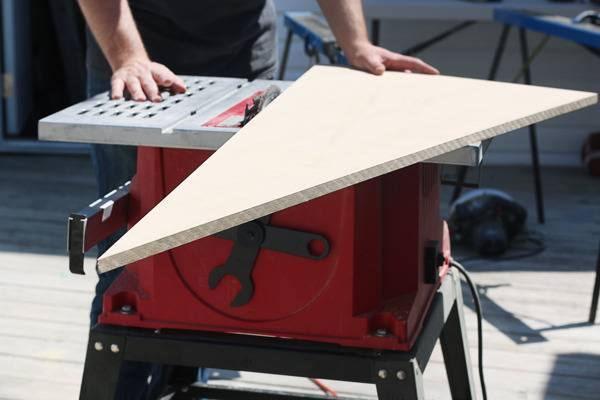
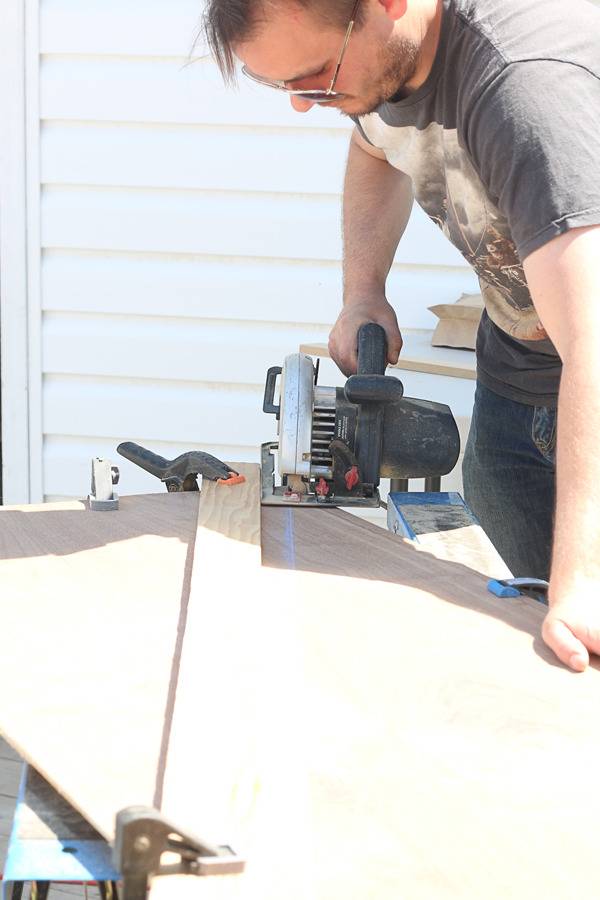
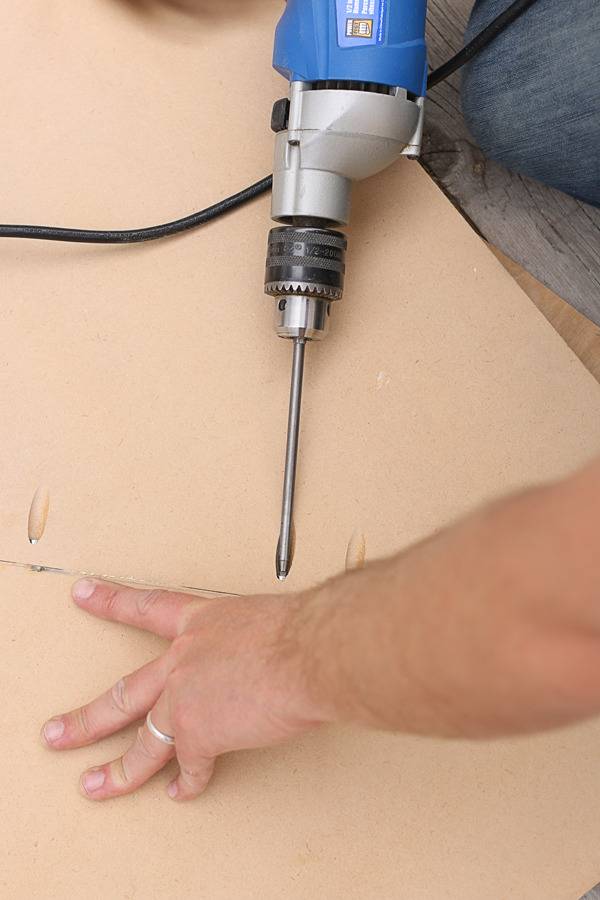
1) Cut mdf to desired shape and size. We chose to cut 2 mirrored pieces and join at a 45degree angle using pocket hole screws and glue. This way we could use a smaller (2’X4’) sheet rather than the standard 4’X8’ (which we could not fit in our car.
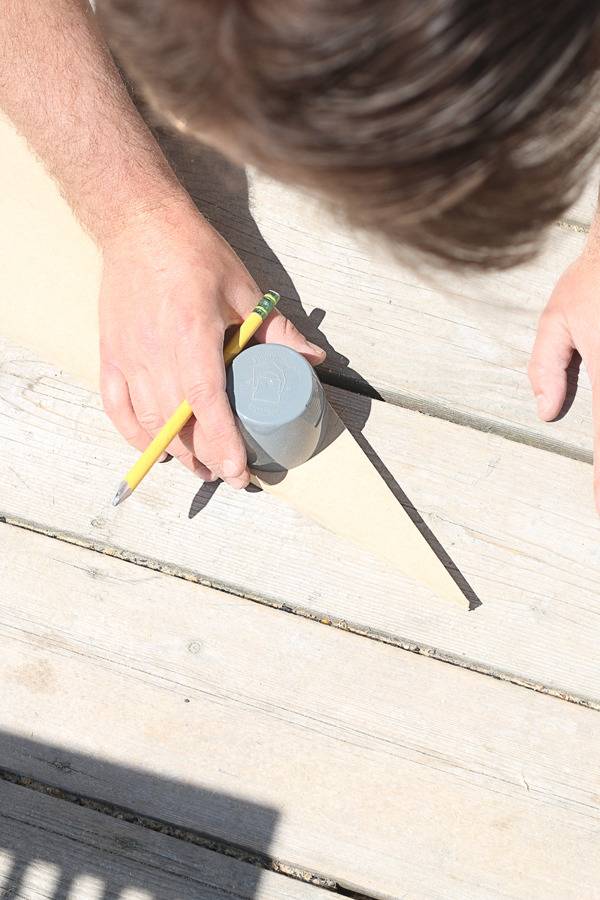

2) Round off the pointed ends of the table top using a jig saw. We used a spray paint lid as the template.
3.Cut the walnut plywood to the same size and shape of the mdf, allowing for at least 1/2” overhang.
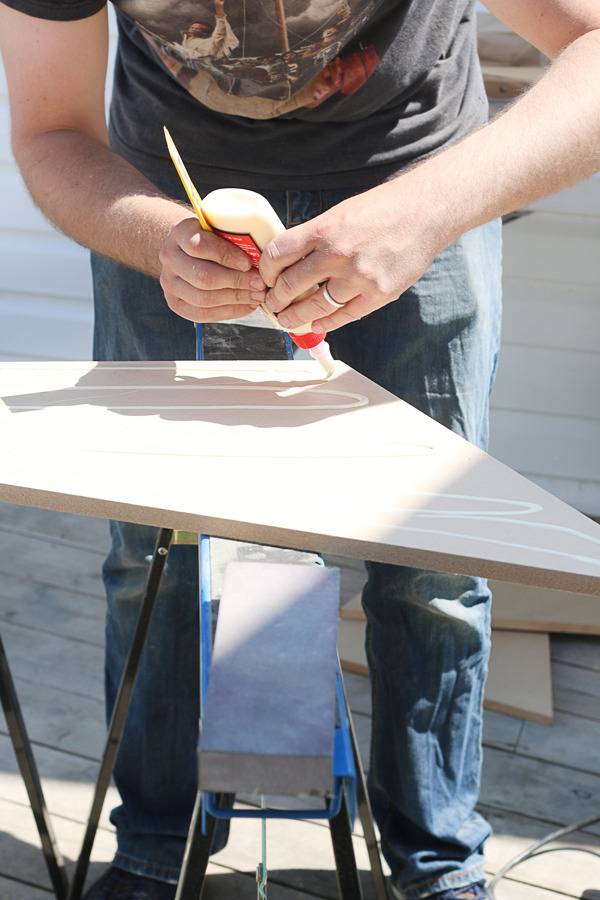
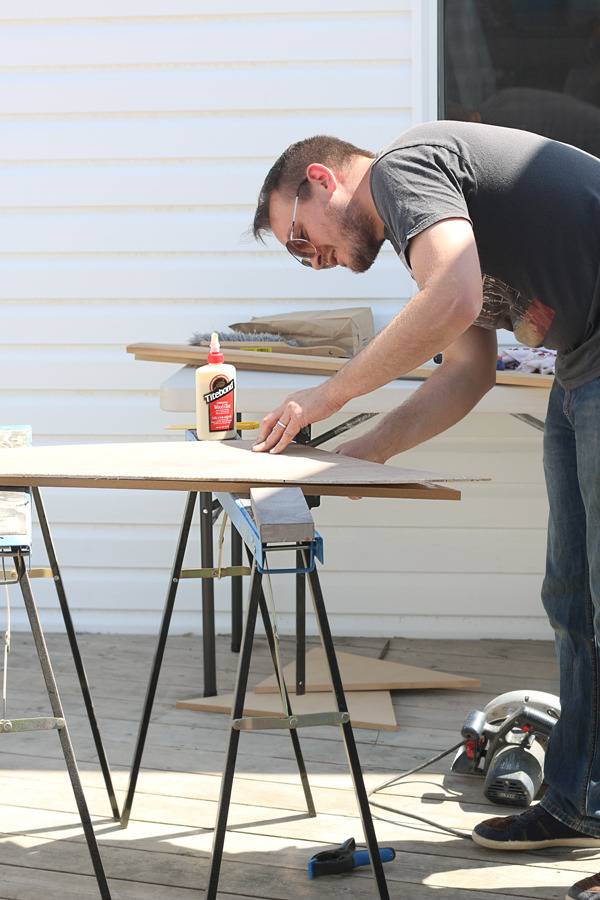
4) Using a generous amount of wood glue and clamp the walnut plywood to the top of the mdf. Allow glue to cure at least 2 hrs before removing clamps. Let the glue dry for a full 12 hours before working the wood, or follow the manufacturer’s directions.
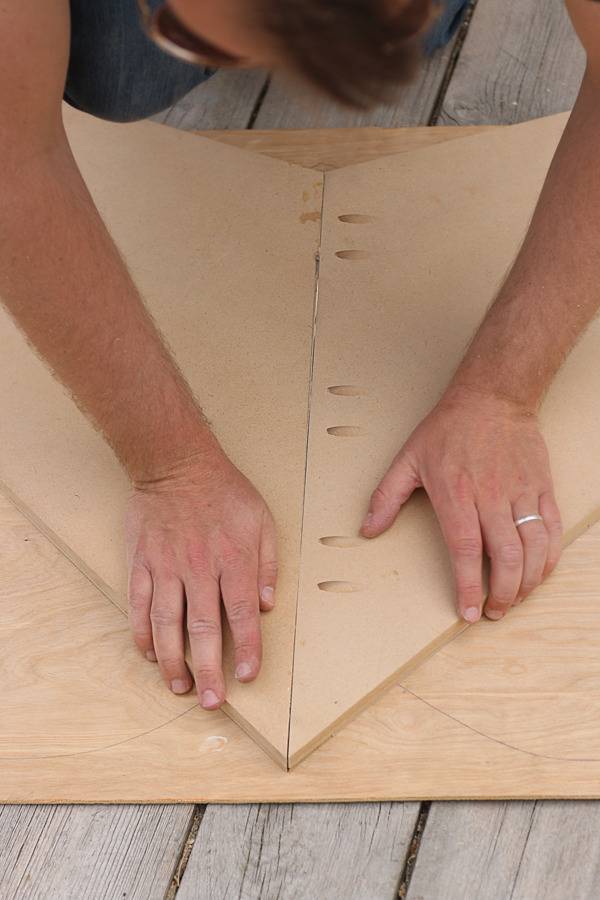
5) Join the two pieces at a 45 degree angle using pocket hole screws and glue.
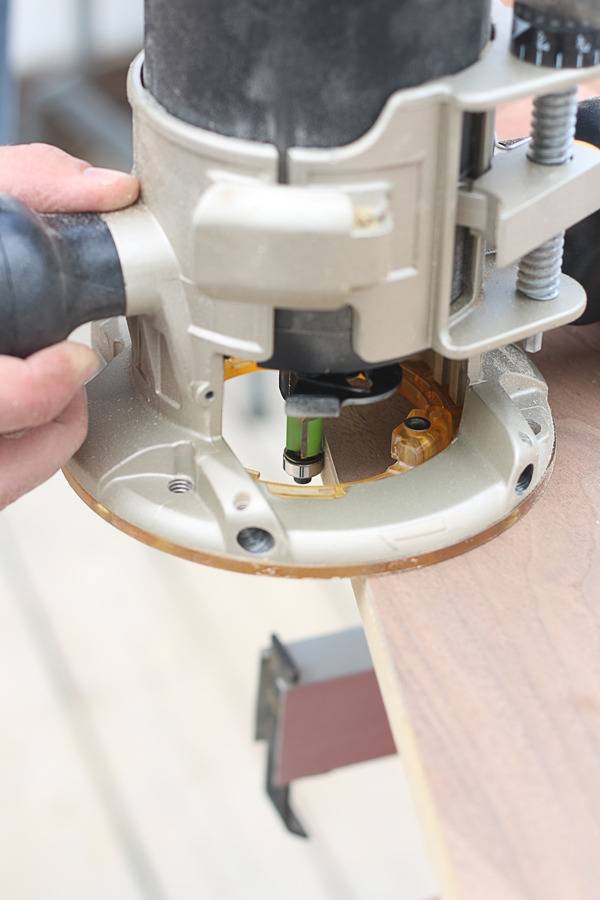
6) Using a router with a flush-trim router bit, trim the excess walnut plywood until it is flush with the mdf.
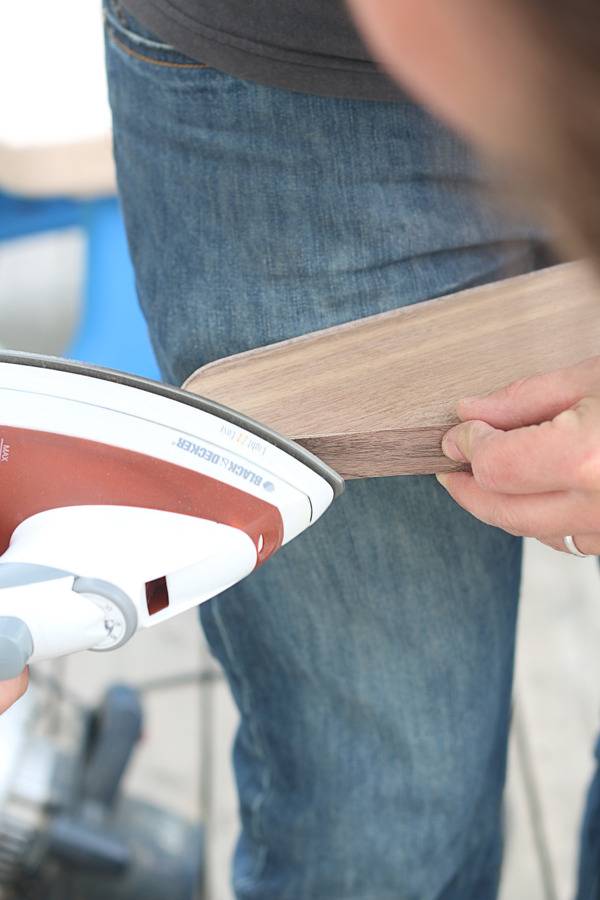
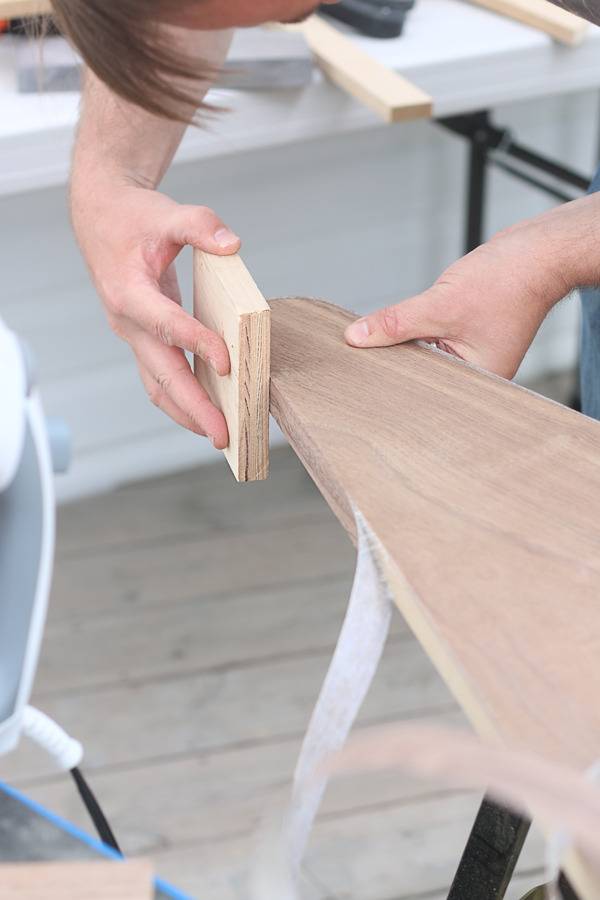
7) Using an iron, iron on the walnut edge banding as directed on packaging. Using a hand plane, trim the excess edge banding until flush with the table top.
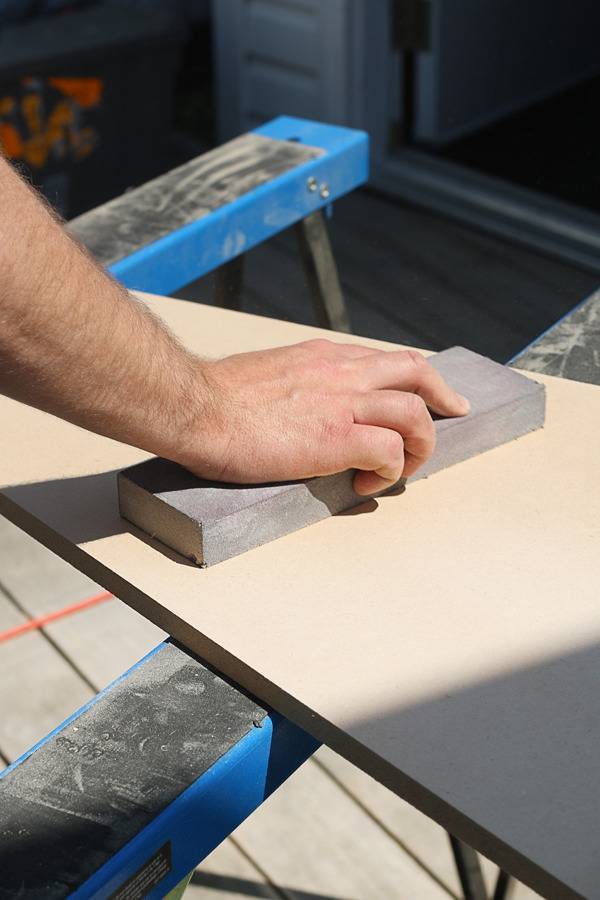
8) Hand sand the entire project lightly with medium, then fine grit sandpaper.
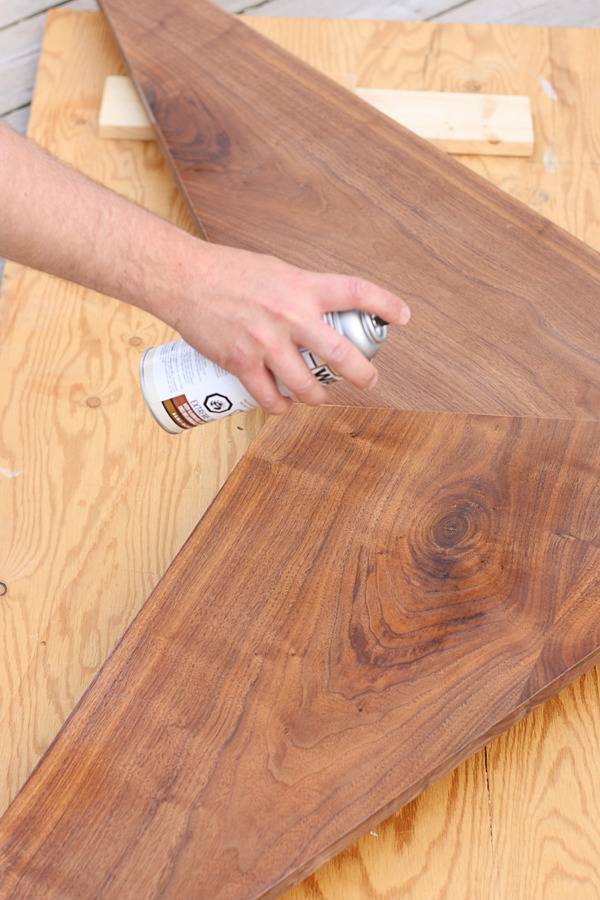
9) Spray the entire table top and edges with semi gloss spray lacquer. We used 3 coats.
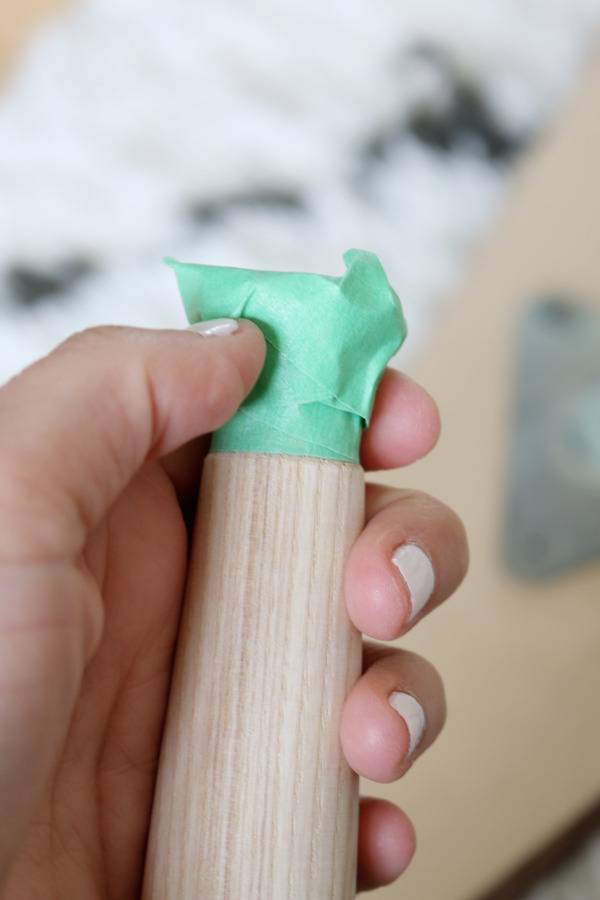
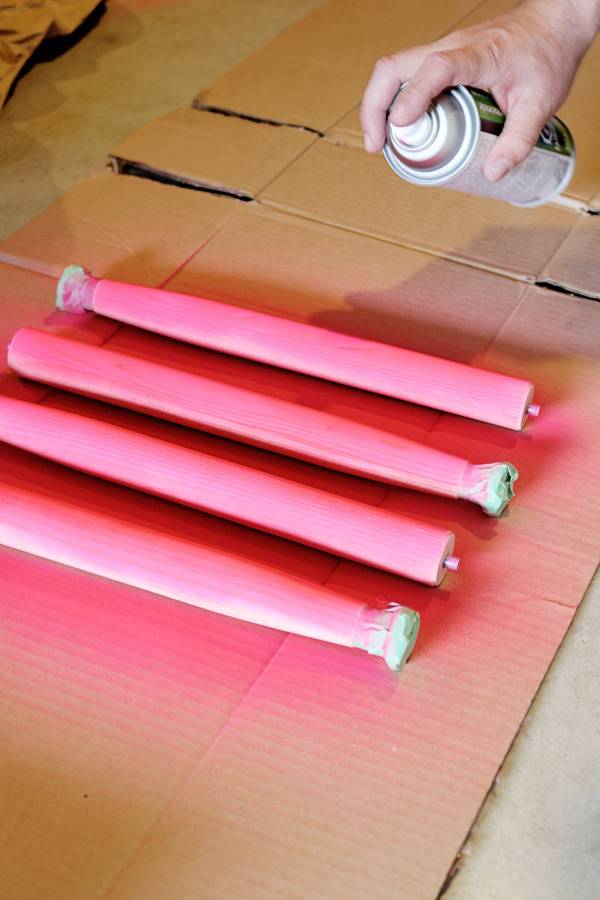
10) Sand the table legs, tape off the brass feet, and spray paint them your desired color. When completely dry, seal them with spray lacquer.
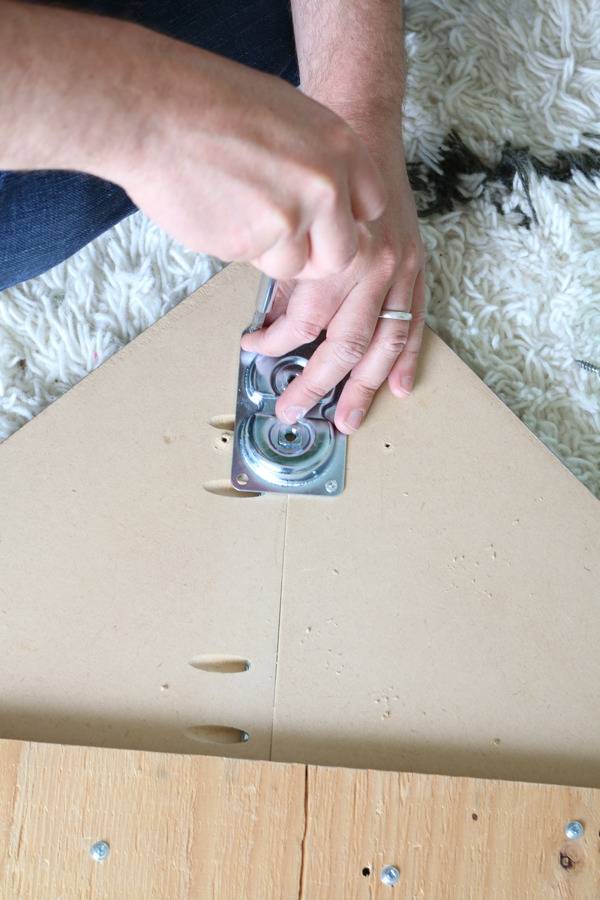
11) Attach leg mounting plates to the bottom of the table top with a screwdriver. Boomerang shapes require only 3 legs, but we decided to go with 4. We put 2 in the middle to brace the seam and give it more support.
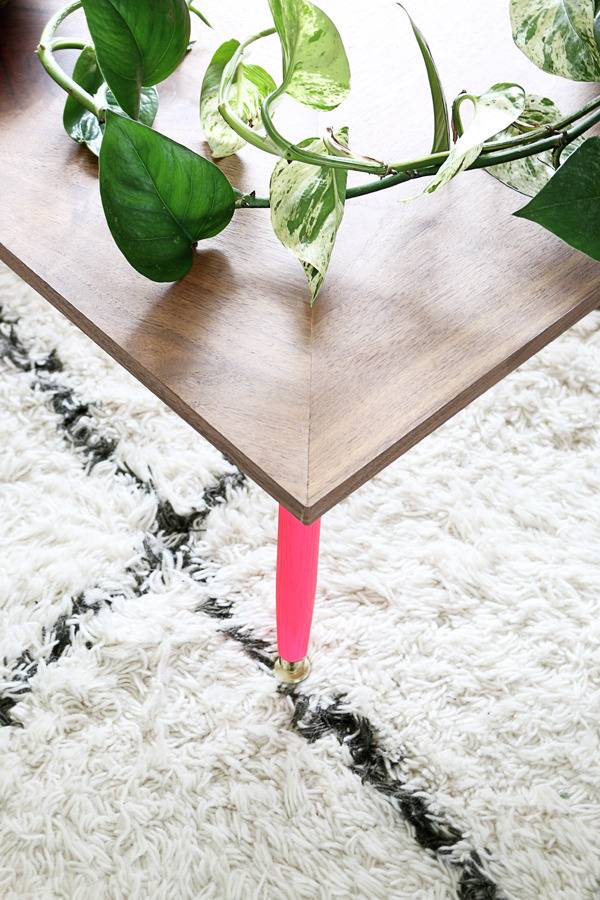
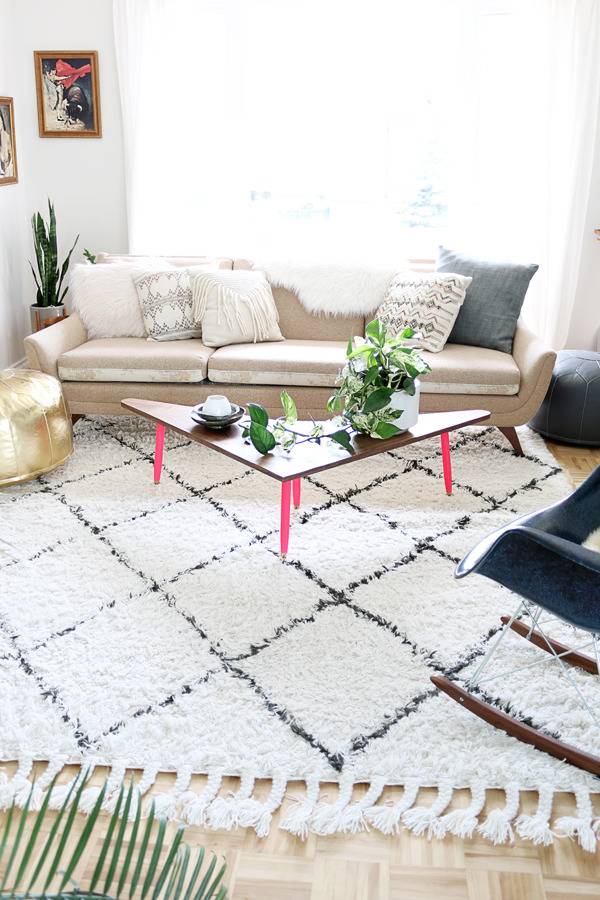
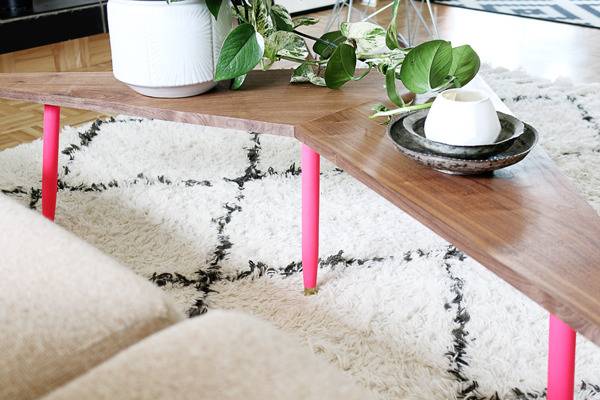
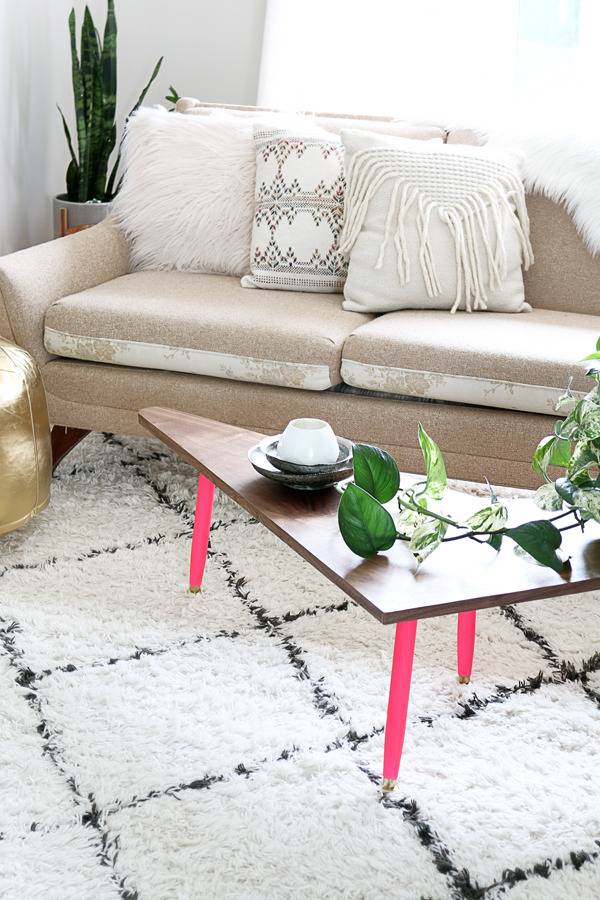
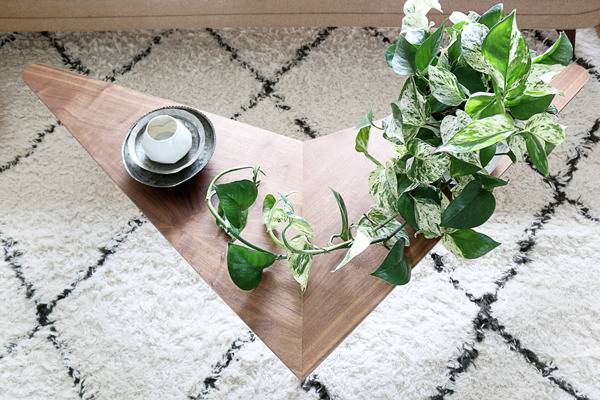
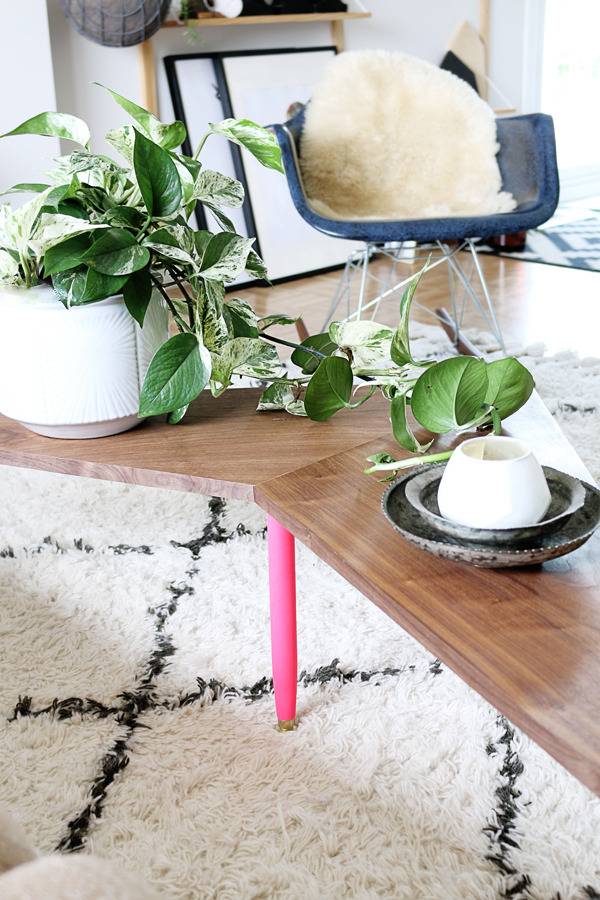
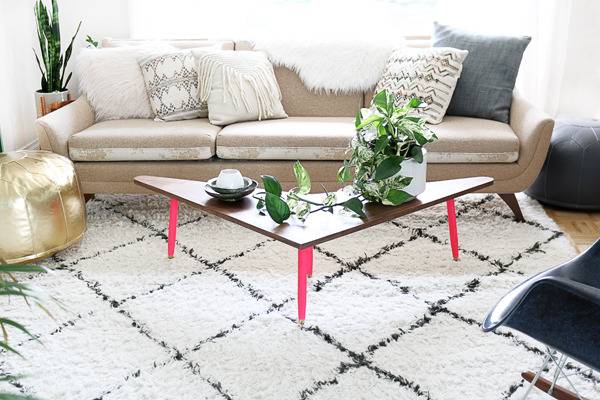
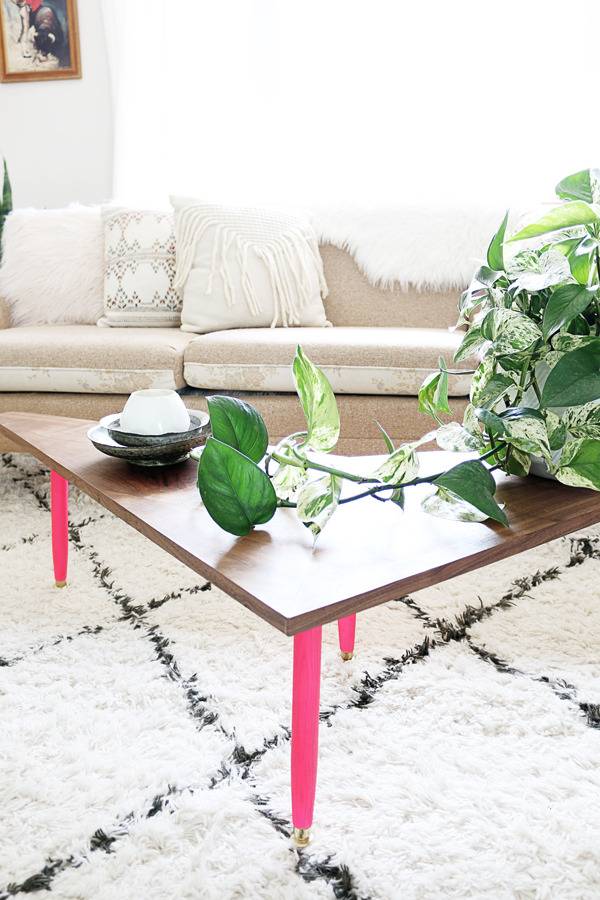
I am so pleased with the finished look! It has that classic mid-century vibe, but with a modern twist because of those bright neon pink legs. That burst of color is perfect for the summer (despite the fact that it’s definitely something I would normally NEVER choose), which it works in this space because the overall palette is very neutral. It’s also nice to add something a little unexpected sometimes, it gives the room a bit more personality – don’t you think? The best thing about the legs is that I can easily remove them and spray paint them another color if (and when) I get sick of the color! The shape of the table is so playful and yet, effective. I’m able to have a large surface to work with, while remaining low-profile so it doesn’t take up a whole lot of room either. It’s a great piece and I am so happy with our new living room addition! What do you think of this coffee table – are you a fan of the shape and color combo?
Very nice! While I would not have used pink (for some reason I am into orange right now), it does give it a pop of color. I really like this idea!
This is beautiful, Lidy!
Thanks so much Alicia – means a lot!!!
@troutay – Thank you! I think Orange would look stunning for sure 🙂
XO, Lidy